By Hera Grace
There’s nothing quite like the feeling of freshly pampered feet—but you don’t need a salon appointment to enjoy it. With a little preparation and some simple tools, you can recreate a luxurious spa pedicure in the comfort of your home. Whether you’re winding down from a long week or prepping for open-toe season, this step-by-step guide will walk you through your perfect at-home pedicure.
🌸 Step 1: Set the Spa Mood

Set the Spa Mood
Before you begin, create a calming environment. Light a candle, play soothing music, and pour a cup of herbal tea. A relaxing atmosphere turns a simple pedicure into a soul-soothing ritual.
💅 Step 2: Remove Old Polish

Remove Old Polish
Start with a clean slate. Use a gentle nail polish remover to take off any old polish. Make sure your nails are completely free of residue to help the new polish adhere better.
🛁 Step 3: Soak Your Feet

Soak Your Feet
Soak your feet in a basin of warm water mixed with Epsom salts, essential oils, or a specialty foot soak for 10–15 minutes. This softens your skin and cuticles and helps ease tension.
Spa Tip: Add rose petals or a splash of milk for extra indulgence.
🧽 Step 4: Exfoliate

foot scrub or pumice stone
Use a foot scrub or pumice stone to slough off dead skin. Focus on rough areas like your heels and the balls of your feet. This will leave your feet feeling silky-smooth.
DIY Scrub Recipe: Mix 2 tbsp of sugar with 1 tbsp of olive oil and a few drops of peppermint oil.
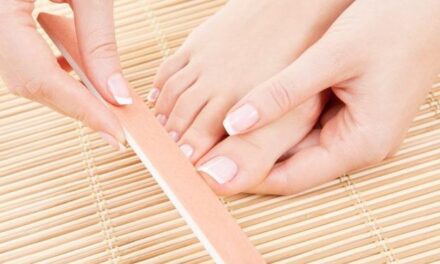
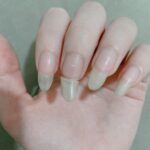
✂️ Step 5: Trim and Shape

Trim and Shape
Gently pat your feet dry. Clip toenails straight across to avoid ingrown nails, then file them into shape. Use a buffer if needed to smooth the nail surface.
🌿 Step 6: Care for Cuticles

cuticle oil
Apply a drop of cuticle oil or lotion to each nail and gently push the cuticles back with an orange stick. This step keeps your nail bed neat and healthy.
🧴 Step 7: Moisturize and Massage

Massage
Massage a rich foot cream into your feet, focusing on dry areas. A Hera Grace favorite tip: slip on cotton socks afterward to lock in moisture and wake up to baby-soft feet.
🎨 Step 8: Polish Like a Pro

Polish
-
Prep: Swipe nails clean of oil and lotion.
-
Base Coat: Start with a nourishing base.
-
Color: Apply two thin coats of your chosen shade.
-
Top Coat: Finish with a glossy seal.
Choose elegant, timeless polish colors that reflect the soft, refined palette of the Hera Grace brand—think soft blush, mauve, or deep plum.
⏳ Step 9: Let It Dry
Allow at least 30 minutes for polish to dry completely. Settle in with a good book or journal—a moment of stillness, a core value in the Hera Grace lifestyle.
✨ Final Touch: Keep Your Feet Happy

happy feet
-
Moisturize daily with a nourishing foot balm.
-
Refresh polish every 2–3 weeks.
-
Soak once a week to maintain softness and calm.
💖 Final Thoughts
The Hera Grace approach to beauty is rooted in intention, care, and elegance. A DIY pedicure isn’t just about pretty toes—it’s about creating space to nurture yourself from the ground up. By following these simple steps, you can bring the spa home and enjoy a moment of luxurious self-care, anytime.
Stay polished. Stay grounded. Stay graceful—with Hera Grace.